Tuesday, May 28, 2013

DIY Creative Crafts - Paper Creations (Part 3)

So did you have fun making those little scrapbook stickers or some wonderful veggies and fruits? Did you create something even more exciting? I would love to hear from you, please share your wonderful creations!
Here's another addition to the amazing list of creations I shared earlier. We (I & my daughter) made a little bunting. I wanted to accentuate a certain place in my room that had her pics and I thought it would be a good idea to include a little bunting with her name. 

1) Take the cardboard box (as I mentioned in earlier posts) and draw the letters you wish to create a bunting with. Carefully cut them and then paint with colors of your choice (watercolors, crayons or acrylic). I used watercolors  as its easy for my daughter to use them.


2) Then use the tiny stickers I mentioned in the IInd part. Attach them to various alphabets. You could use a theme or just create some random cute little stick-ons. 

3) Now take a string and attach those gorgeous letters with some tape on the back. Well, next? You're ready to hang a lovely little alphabet bunting! Try many more fun words like 'Love', 'Girl', 'Boy' etc. 
So this was a lot of fun with some scrap of card paper that would have been thrown away. But with a little creativity, it has turned into so many lovely little creations. Isn't that amazing. And the best thing is, that it can keep your child engrossed for quite sometime!

Drop in your comments, I'd love to know what all you tried! Share the fun :)

Completely Handmade

Monday, May 27, 2013

My First Handmade Fabric Baskets

Yay! I've finally made two! Baskets that is...

I am madly in love with baskets...of all kinds...but Fabric baskets are my favorite and am totally crazy about them!
I love them so much that if I was as tiny as a bug, I'd live all my life in one of those! :)

And till now I have not been able to purchase a sewing machine for myself... well that's purely because of the nomadic lifestyle we follow :)  ...so both these baskets are completely hand stitched. 

I have already made one earlier, in burlap & felt... A Tie-Me-Up Basket that can be stored flat when not in use... this too was completely hand stitched.


Fabric baskets are amazing. They can be stacked anywhere, can be made in awesome fabrics and you can literally stuff your world in it!

Well, am pretty happy with the outcome...it certainly serves my need of organic stylish storage (awesome definition, isn't it?) 

Thinking about getting them to my Etsy shop! ...should I ?

Let me know through your comments if its good to go to Etsy racks :)

Completely Handmade

Sunday, May 26, 2013

DIY Creative Crafts - Paper Creations (Part 2)

This is Part II of DIY with Paper. I hope you thoroughly enjoyed creating wonderful things out of paper. Do share with us, your wonderful paper creations. Its lovely to know that someone, somewhere 'did' try a DIY I posted! :)
Okay, if you've tried something out of the previous DIY post (Paper Creations Part-1), you would be having numerous ideas already. I have some of them and would love to share with you.

Little girls love playing with their kitchen sets. Designing their grocery on paper and coloring it (just as the original) would be exciting not only for them but also for you (as a Mom)... You could create Coke cans, Milk tetra packs, Chocolates & so on.... Although the product would be one dimensional, it is something you can recreate, even if kids lose a piece or it tears. I tried making a few fruits, veggies, noodles, Coke etc for my daughter. And she loved cooking them! :)


There is no end to what you can design and color... And the best part is, all this can be recreated at no cost!

Alright, now let's get onto the next idea!

Its fun to teach your child to start a diary (by age 4 or 5)... so they could pen down some fun things they did at that age... or maybe just have a little scrapbook to note something they saw or liked... And yes, you don't have to get them flashy stickers or exotic stationary to decorate their diary/journal/scrapbook...

Let them design what they want to stick on a page... For example, your son  would be excited to spot a green caterpillar or ladybird ! Make that a special moment. design it, color it, cut it and paste it on a page which says '04-02-12: Saw a caterpillar, found it cute' ! And many such exciting moments that kids come across. 


These are tiny & look gorgeous on a scrapbook etc. Please do not create such tiny things if your kid is aged between 1 to 3 years. 

The next part would host a few more exciting things we can create out of card paper. If you have tried it, do share. I would love to read what you have to say! 

Have fun!

Completely Handmade

Thursday, May 23, 2013

DIY Creative Crafts - Paper Creations (Part 1)

Thinking of how to engage kids into something creative this summer? Kids are a curious lot and need to use their burst of energy into something constructive, otherwise of course they have a lot of stuff (your precious decor) in the house to toy around!

Okay,so let's get started.

Let us begin with cardboard paper. Take a cookie/cereal box or any other such packaging box. We all have a number of them. Firstly it helps us re-use something that would anyway go waste (help your child learn to be Environment friendly). Secondly, you don't have to plan or run around to get any stationery for such crafts, so you can start off instantly. Thirdly, paper crafts (for that matter anything thats kids play with) last only for a few days, so you don't need expensive paper.

1) You need:  Cardboard paper (re-use a packaging or just get some sheets), colors (I chose pencil colors, as its easy for my kid to use them!), Scissors, Tape, String or Imitation chain.


2) Cut out 3x3 inch squares. You or your kid can draw their favorite things like animals, characters, animals etc.


3) Cut out neatly, the shapes or characters you've drawn. If your kid is old enough to use scissors, let him/her do it.


4) Color them! I highlighted the outline with a black fountain pen.


5) Cut out 1.5 inch piece of string, loop it & stick it on the backside of your cut out.


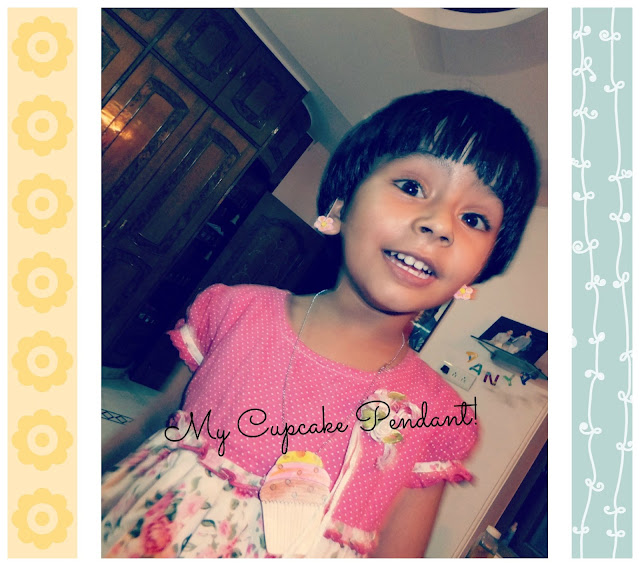
5) String it! You're ready to wear your new pendant.


5) Or just attach a safety pin with some tape to create a pretty brooch...!


5) Okay little girl, you're ready for your doll party! And hey! boys can have fun too... attach a car, ball or animal brooch on the cap...


Enjoy!, A lot more coming up... Let me know if you tried this!
xx

Completely Handmade